Map Editor: Difference between revisions
mNo edit summary |
(Major update to the map editor page. Tool explanation.) |
||
| Line 1: | Line 1: | ||
Map Editor is an official tool, available with the game, used to create custom maps. | |||
= Map versions = | |||
Each expansion updated the map editor, adding new [[List_of_adventure_map_objects (HotA)|Adventure map objects]] and features; as a result, only maps with the same or older version than the one used by the editor itself can be created or altered. | |||
All changes made to a map using a more updated map editor than the one the map was originally made with will automatically update the map to the newer version. | |||
The Hota Map Editor is the most recently updated version of the editor.[[citation needed]] | |||
= Tools and options = | |||
* ''Zoom in'' and ''Zoom out'' are available in the View category on the Toolbar | |||
* ''Undo'' and ''Redo'' (found in Edit -> , accessible through Ctrl + Z and Ctrl + Y respectively) can be used on any and all changes to the map. | |||
* ''Cut'', ''Copy'', ''Paste'' and ''Delete'' (found in Edit) can be used on a single object at a time. They cannot be used on [[Terrain#Basic Terrain|Basic Terrain]], [[Road]]s, or [[River]]s. These four tools can be activated using standard Windows keys, namely Ctrl + X, Ctrl + C, Ctrl + V and Delete. | |||
* The ''Find'' tool (Edit -> Find) can be used to find all objects of a specified object type on the map. It can be activated using Ctrl+F. The subsequent objects of the same type can be found by pressing F3. Since [[Hota|Hota 1.7.0]], the search tool can be used to find [[Border Gate]]s, [[Keymaster's Tent]]s and [[Monolith]]s of a specified color ({{-wh}}). | |||
* All custom text in a map, including all timed events, [[Hero]] names, Hero backstories, [[Pandora's Box]]es and [[Event]]s messages, Artifact and Monster messages, etc. can be ''exported'' into a map_name.txt file, where map_name is the name of the map. The text can be then edited in any text editor, f.e. Notepad. As long as the placement of line breaks between custom texts and custom text descriptions are unaltered, this file can then be ''imported'' back into the map, replacing all custom text. | |||
* View -> ''Underground'' (Ctrl+ U) can be used to switch between the surface and the underground of the map, provided the map has an underground layer. | |||
* View -> Grid (Ctrl + G) can be used to view the grid separating each tile. | |||
* View -> Passability (Ctrl + P) can be used to view the possibility of different objects and visit cells. This can allow the mapmaker to see which tiles are accessible from where, whether a monster guards access to an object, etc. | |||
* View -> Object animation (Ctrl + A) can be used to switch on or off the animation of all objects on the currently edited map. It is advised to turn off the animation when using slower devices. | |||
* View -> Terrain animation (Ctrl + T) can be used to switch on or off the animation of the terrain, particularly the water, on the currently edited map. It is advised to turn off the animation when using slower devices. | |||
* View -> Toolbar, Mode Bar and Status Bar can be used to switch the side bars on or off. | |||
* Player -> ''No player'' and Player -> ''Player i (color)'' can be used to assign newly placed Towns, Mines, Creature Generators and Heroes to the currently chosen player. If the "No player" option is chosen, no Heroes can be placed on the map, and all new Towns, Mines and Creature Generators are assigned to be neutral. | |||
* Tools -> Erase can be used to remove all objects except [[Terain#Basic Terrain|Basic Terrain]]. The size of the brush is customizable - 1x1, 2x2, 4x4 or Area Brush. These Eraser brushes are available by pressing Shift + Z, Shift + X, Shift + C and Shift + V respectively. | |||
== [[Terrain]] == | |||
Terrain can be placed using the Terrain Tool. The size of the brush is customizable - 1x1, 2x2, 4x4 or Area Brush (accessible on the Tool Bar, in Tools ->, as well as once "Z", "X", "C" or "V" are pressed, respectively), where the latter can be used to drag over a chosen area to cover it with the chosen terrain. Placing different types of terrain next to each other, particularly when using Rock or Water, causes the Map Editor to automatically adjust the shape of the terrain to best match the covered tiles. The Map Editor will try to minimize small pools of water and rock and connect nearby patches of a similar terrain. | |||
== [[River]]s == | |||
Rivers can be placed using the River Tool. There are 4 types of rivers available: | |||
* Clear rivers (Alt + 1) | |||
* Icy rivers (Alt + 2) | |||
* Muddy rivers (Alt + 3) | |||
* Lava rivers (Alt + 4) | |||
A special eraser for rivers only is available under the same part of the toolbar. | |||
== [[Road]]s == | |||
Roads can be placed using the Road Tool. There are 3 types of roads available: | |||
* Dirt roads (Shift + 1) | |||
* Gravel roads (Shift + 2) | |||
* Cobblestone roads (Shift + 3) | |||
Roads have a special eraser, available under the same part of the toolbar. | |||
== Obstacles == | |||
Random, terrain-fitting obstacles can be placed on the map in a brushed area by using the Obstacle Tool. The obstacle brush can be "solid" (obstacles appear only and exactly on all passable and impassable tiles on which the solid brush was placed) or "fuzzy" (obstacles appear on all passable and impassable tiles of the solid part of the fuzzy brush, and ''may'' appear on random non-solid tiles on which the fuzzy brush was placed). The size of the brush is customizable (1x1, 2x2, 4x4, Area) and is accessible through Tools -> Obstacles or by pressing Shift + Q, Shift + W, Shift + E and Shift + R for the Solid Brush (respectively for each size) and Shift + Alt + Q, Shift + Alt + W, Shift + Alt + E, Shift + Alt + R for the fuzzy brush (again, respectively for each size). | |||
Obstacle tool has its own Eraser that can be used to clear the solid or fuzzy brush. The "solid eraser" removes both the solid and the fuzzy brush, while the "fuzzy eraser" removes the solid and the fuzzy brush and replaces all tiles marked with either obstacle brush surrounding the cleared tiles with a fuzzy obstacle tool brush. The obstacle erasers are accessible through Tools -> Obstacles, as well as by pressing Shift + A, Shift + S, Shift + D and Shift + F for the solid eraser (respectively for each size) or Shift + Alt + A, Shift + Alt + S, Shift + Alt + D and Shift + Alt + F for the fuzzy eraser (again, respectively for each size). | |||
== Objects == | |||
Objects appropriate for each Terrain can be found in Tools -> Objects, or by pressing pressing a key from Q to ], depending on the placement of the Object Terrain type on the toolbar: | |||
Q: Dirt objects, | |||
W: Sand objects, | |||
E: Grass objects, | |||
R: Snow objects, | |||
T: Swamp objects, | |||
Y: Rough objects, | |||
U: Subterranean objects, | |||
I: Lava objects, | |||
O: Highland objects, | |||
P: Wasteland objects, | |||
[: Water objects, | |||
]: Miscellaneous decorations. | |||
The objects can be scrolled through on the right side of the Map Editor's interface, by using the arrow keys (changed in Hota for the mouse scroll {{-wh}}) | |||
<gallery> | <gallery> | ||
Revision as of 18:53, 18 January 2024
Map Editor is an official tool, available with the game, used to create custom maps.
Map versions
Each expansion updated the map editor, adding new Adventure map objects and features; as a result, only maps with the same or older version than the one used by the editor itself can be created or altered.
All changes made to a map using a more updated map editor than the one the map was originally made with will automatically update the map to the newer version.
The Hota Map Editor is the most recently updated version of the editor.citation needed
Tools and options
- Zoom in and Zoom out are available in the View category on the Toolbar
- Undo and Redo (found in Edit -> , accessible through Ctrl + Z and Ctrl + Y respectively) can be used on any and all changes to the map.
- Cut, Copy, Paste and Delete (found in Edit) can be used on a single object at a time. They cannot be used on Basic Terrain, Roads, or Rivers. These four tools can be activated using standard Windows keys, namely Ctrl + X, Ctrl + C, Ctrl + V and Delete.
- The Find tool (Edit -> Find) can be used to find all objects of a specified object type on the map. It can be activated using Ctrl+F. The subsequent objects of the same type can be found by pressing F3. Since Hota 1.7.0, the search tool can be used to find Border Gates, Keymaster's Tents and Monoliths of a specified color (
 ).
). - All custom text in a map, including all timed events, Hero names, Hero backstories, Pandora's Boxes and Events messages, Artifact and Monster messages, etc. can be exported into a map_name.txt file, where map_name is the name of the map. The text can be then edited in any text editor, f.e. Notepad. As long as the placement of line breaks between custom texts and custom text descriptions are unaltered, this file can then be imported back into the map, replacing all custom text.
- View -> Underground (Ctrl+ U) can be used to switch between the surface and the underground of the map, provided the map has an underground layer.
- View -> Grid (Ctrl + G) can be used to view the grid separating each tile.
- View -> Passability (Ctrl + P) can be used to view the possibility of different objects and visit cells. This can allow the mapmaker to see which tiles are accessible from where, whether a monster guards access to an object, etc.
- View -> Object animation (Ctrl + A) can be used to switch on or off the animation of all objects on the currently edited map. It is advised to turn off the animation when using slower devices.
- View -> Terrain animation (Ctrl + T) can be used to switch on or off the animation of the terrain, particularly the water, on the currently edited map. It is advised to turn off the animation when using slower devices.
- View -> Toolbar, Mode Bar and Status Bar can be used to switch the side bars on or off.
- Player -> No player and Player -> Player i (color) can be used to assign newly placed Towns, Mines, Creature Generators and Heroes to the currently chosen player. If the "No player" option is chosen, no Heroes can be placed on the map, and all new Towns, Mines and Creature Generators are assigned to be neutral.
- Tools -> Erase can be used to remove all objects except Basic Terrain. The size of the brush is customizable - 1x1, 2x2, 4x4 or Area Brush. These Eraser brushes are available by pressing Shift + Z, Shift + X, Shift + C and Shift + V respectively.
Terrain
Terrain can be placed using the Terrain Tool. The size of the brush is customizable - 1x1, 2x2, 4x4 or Area Brush (accessible on the Tool Bar, in Tools ->, as well as once "Z", "X", "C" or "V" are pressed, respectively), where the latter can be used to drag over a chosen area to cover it with the chosen terrain. Placing different types of terrain next to each other, particularly when using Rock or Water, causes the Map Editor to automatically adjust the shape of the terrain to best match the covered tiles. The Map Editor will try to minimize small pools of water and rock and connect nearby patches of a similar terrain.
Rivers
Rivers can be placed using the River Tool. There are 4 types of rivers available:
- Clear rivers (Alt + 1)
- Icy rivers (Alt + 2)
- Muddy rivers (Alt + 3)
- Lava rivers (Alt + 4)
A special eraser for rivers only is available under the same part of the toolbar.
Roads
Roads can be placed using the Road Tool. There are 3 types of roads available:
- Dirt roads (Shift + 1)
- Gravel roads (Shift + 2)
- Cobblestone roads (Shift + 3)
Roads have a special eraser, available under the same part of the toolbar.
Obstacles
Random, terrain-fitting obstacles can be placed on the map in a brushed area by using the Obstacle Tool. The obstacle brush can be "solid" (obstacles appear only and exactly on all passable and impassable tiles on which the solid brush was placed) or "fuzzy" (obstacles appear on all passable and impassable tiles of the solid part of the fuzzy brush, and may appear on random non-solid tiles on which the fuzzy brush was placed). The size of the brush is customizable (1x1, 2x2, 4x4, Area) and is accessible through Tools -> Obstacles or by pressing Shift + Q, Shift + W, Shift + E and Shift + R for the Solid Brush (respectively for each size) and Shift + Alt + Q, Shift + Alt + W, Shift + Alt + E, Shift + Alt + R for the fuzzy brush (again, respectively for each size).
Obstacle tool has its own Eraser that can be used to clear the solid or fuzzy brush. The "solid eraser" removes both the solid and the fuzzy brush, while the "fuzzy eraser" removes the solid and the fuzzy brush and replaces all tiles marked with either obstacle brush surrounding the cleared tiles with a fuzzy obstacle tool brush. The obstacle erasers are accessible through Tools -> Obstacles, as well as by pressing Shift + A, Shift + S, Shift + D and Shift + F for the solid eraser (respectively for each size) or Shift + Alt + A, Shift + Alt + S, Shift + Alt + D and Shift + Alt + F for the fuzzy eraser (again, respectively for each size).
Objects
Objects appropriate for each Terrain can be found in Tools -> Objects, or by pressing pressing a key from Q to ], depending on the placement of the Object Terrain type on the toolbar: Q: Dirt objects, W: Sand objects, E: Grass objects, R: Snow objects, T: Swamp objects, Y: Rough objects, U: Subterranean objects, I: Lava objects, O: Highland objects, P: Wasteland objects, [: Water objects, ]: Miscellaneous decorations.
The objects can be scrolled through on the right side of the Map Editor's interface, by using the arrow keys (changed in Hota for the mouse scroll ![]() )
)
-

The base Homm3 map editor
-

The update Homm3 HotA map editor
-
The way a random town appears in the map editor.
-
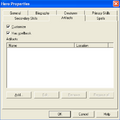
Add artifact to hero screen
-
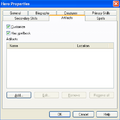
Updated add artifact to hero screen


.png)