Template:CampaignScenario: Difference between revisions
Jump to navigation
Jump to search
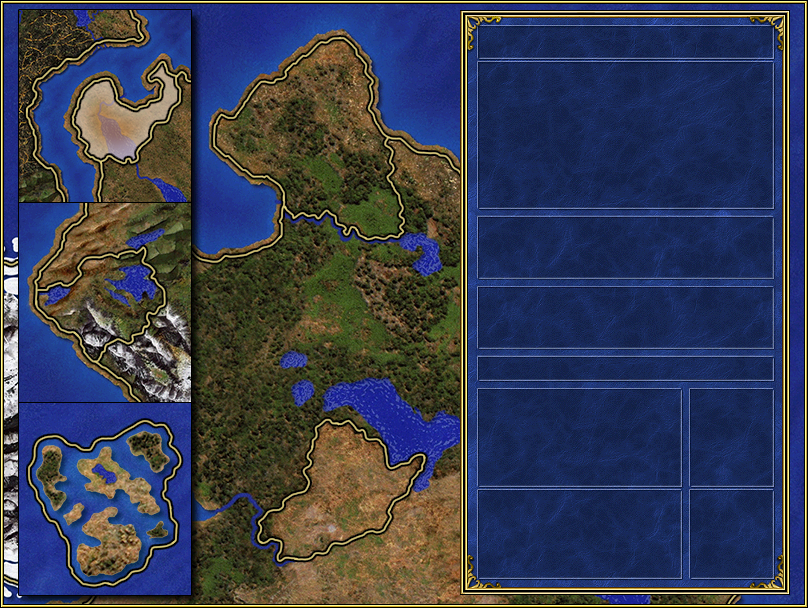
minimap test |
infinity sign appearance |
||
| (33 intermediate revisions by 2 users not shown) | |||
| Line 1: | Line 1: | ||
<includeonly><span style="display:inline-block;"><div style="position:relative;z-index:5;">{{exist|File:Cback {{{cback|}}}.png|[[File:Cback {{{cback|}}}.png|link=|{{{region_text|}}}]]|{{{Image|[[File:Cback hota nomap 1.png|link=|{{{region_text|}}}]]}}}}} | <includeonly><span style="float:right; padding-right:1em;">__TOC__</span><span style="display:inline-block;"><div style="position:relative;z-index:5;">{{exist|File:Cback {{{cback|}}}.png|[[File:Cback {{{cback|}}}.png|link=|{{{region_text|}}}]]|{{{Image|[[File:Cback hota nomap 1.png|link=|{{{region_text|}}}]]}}}}} | ||
<div style="font-family:serif;font-weight:bold;color: #{{Gold 2}}; {{Shadow}} height:10px;position:absolute;left:484px;z-index:10;top: | <div style="font-family:serif;font-weight:bold;color: #{{Gold 2}}; {{Shadow}} height:10px;position:absolute;left:484px;z-index:10;top:28px;font-size:130%">{{gl|{{{scenario|}}}}}</div> | ||
<div style="position:absolute;left: | <!---<div style="position:absolute;left:672px;z-index:10;top:30px;">{{#switch: {{{source|}}}| roe = [[File: Restoration of Erathia map icon.png|Restoration of Erathia|link=Expansions]] | ab = [[File: Armageddon's Blade map icon.png|Armageddon's Blade|link=Expansions]]| sod = [[File: Shadow of Death map icon.png|Shadow of Death|link=Expansions]]| hc = [[File: Heroes Chronicles map icon.png|Heroes Chronicles|link=Expansions]]| hota = [[File: Horn of the Abyss map icon.png|Horn of the Abyss|link=Expansions]]| }}</div>---> | ||
<div style="position:absolute;left: | <div style="position:absolute;left:706px;z-index:10;top:29px;">{{{{{size|S}}} map size icon}}</div> | ||
<div style="position:absolute;left:740px;z-index:10;top: | <div style="position:absolute;left:740px;z-index:10;top:29px;">{{Underground map icon {{{underground|enabled}}}}}</div> | ||
<div style="font-weight:bold;color: #{{Gold 2}}; {{Shadow}} height:10px;position:absolute;left:484px;z-index:10;top:64px">Scenario Description</div> | <div style="font-weight:bold;color: #{{Gold 2}}; {{Shadow}} height:10px;position:absolute;left:484px;z-index:10;top:64px">Scenario Description</div> | ||
<div style="font-weight:bold;color: | <div style="font-weight:bold;color: white;{{Shadow}} height:10px;position:absolute;left:484px;z-index:10;top:86px;width:282px;font-size:89%;line-height:16px;text-align:justify;text-justify:inter-word">{{{description|}}}</div> | ||
<div style="font-weight:bold;color: #{{Gold 2}}; {{Shadow}} height:10px;position:absolute;left:484px;z-index:10;top: | <div style="font-weight:bold;color: #{{Gold 2}}; {{Shadow}} height:10px;position:absolute;left:484px;z-index:10;top:219px">Victory Condition</div> | ||
<div style="font-weight:bold;color: | <div style="font-weight:bold;color: white;{{Shadow}} height:10px;position:absolute;left:484px;z-index:10;top:241px;width:282px;font-size:89%;line-height:16px;text-align:justify;text-justify:inter-word">{{{victory|}}}</div> | ||
<div style="font-weight:bold;color: #{{Gold 2}}; {{Shadow}} height:10px;position:absolute;left:484px;z-index:10;top: | <div style="font-weight:bold;color: #{{Gold 2}}; {{Shadow}} height:10px;position:absolute;left:484px;z-index:10;top:289px">Loss Condition</div> | ||
<div style="font-weight:bold;color: | <div style="font-weight:bold;color: white;{{Shadow}} height:10px;position:absolute;left:484px;z-index:10;top:311px;width:282px;font-size:89%;line-height:16px;text-align:justify;text-justify:inter-word">{{{loss|}}}</div> | ||
<div style="font-weight:bold;color: | <div style="font-weight:bold;color: white;{{Shadow}} height:10px;position:absolute;left:484px;z-index:10;top:360px;font-size:90%;line-height:16px;text-align:justify;text-justify:inter-word">Allies: {{{allies|}}}</div> | ||
<div style="font-weight:bold;color: | <div style="font-weight:bold;color: white;{{Shadow}} height:10px;position:absolute;left:576px;z-index:10;top:360px;font-size:90%;line-height:16px;text-align:justify;text-justify:inter-word">Enemies: {{{enemies|}}}</div> | ||
<div style="font-weight:bold;color: | <div style="font-weight:bold;color: white;{{Shadow}} height:10px;position:absolute;left:528px;z-index:10;top:393px;font-size:90%;line-height:16px;text-align:justify;text-justify:inter-word">Choose a bonus</div> | ||
<div style="position:absolute;left: | <div style="font-weight:bold;color: white;{{Shadow}} position:absolute;left:486px;z-index:10;top:414px;width:200px;text-align:center;">{{{bonus|}}}</div> | ||
<div style="font-weight:bold;color: | <div style="font-weight:bold;color: white;{{Shadow}} height:10px;position:absolute;left:705px;z-index:10;top:393px;font-size:90%;line-height:16px;text-align:justify;text-justify:inter-word">Difficulty</div> | ||
<div style="position:absolute;left:717px;z-index:10;top:414px">{{#switch: {{{difficulty|}}}| Easy = [[File:Easy d.png|Easy|link=Difficulty level]]| Normal = [[File:Normal d.png|Normal|link=Difficulty level]]| Hard = [[File:Hard d.png|Hard|link=Difficulty level]]| Expert = [[File:Expert d.png|Expert|link=Difficulty level]]| Impossible = [[File:Impossible d.png|Impossible|link=Difficulty level]]| }}</div> | <div style="position:absolute;left:717px;z-index:10;top:414px">{{#switch: {{{difficulty|}}}| Easy = [[File:Easy d.png|Easy / Pawn|link=Difficulty level]]| Normal = [[File:Normal d.png|Normal / Knight|link=Difficulty level]]| Hard = [[File:Hard d.png|Hard / Rook|link=Difficulty level]]| Expert = [[File:Expert d.png|Expert / Queen|link=Difficulty level]]| Impossible = [[File:Impossible d.png|Impossible / King|link=Difficulty level]]| }}</div> | ||
<span style="width:800px><div style="font-weight:bold;color: | <span style="width:800px><div style="font-weight:bold;color: white;{{Shadow}} height:10px;position:absolute;width:1463px;z-index:10;top:466px;font-size:90%;line-height:16px;text-align:center;vertical-align:middle;">{{{difficulty|}}}</div></span> | ||
<div style="font-weight:bold;color: | <div style="font-weight:bold;color: white;{{Shadow}} height:10px;position:absolute;left:504px;z-index:10;top:494px;font-size:90%;line-height:16px;text-align:justify;text-justify:inter-word">Carried to next scenario</div> | ||
<div style="position:absolute;left: | <div style="font-weight:bold;color: white;{{Shadow}} height:62px;position:absolute;left:479px;z-index:10;top:510px;width:200px;text-align:center;"><div style="position: relative; top: 50%; transform: translateY(-50%);">{{{carry|}}}</div></div> | ||
<div style="font-weight:bold;color: | <div style="font-weight:bold;color: white;{{Shadow}} height:10px;position:absolute;left:700px;z-index:10;top:494px;font-size:90%;line-height:16px;text-align:justify;text-justify:inter-word">Level cap</div> | ||
<div style="position:absolute;left:708px;z-index:10;top:506px">[[File:Exp2.gif|link=Experience|48px]]</div> | <div style="position:absolute;left:708px;z-index:10;top:506px">[[File:Exp2.gif|link=Experience|48px]]</div> | ||
<div style="font-weight:bold;color: | <div style="font-weight:bold;color: white;{{Shadow}} height:10px;position:absolute;width:1463px;z-index:10;top:554px;font-size:140%;line-height:16px;text-align:center;vertical-align:middle;margin:0 auto;font-family:cursive;">{{{max_lvl|}}}</div></div></span> | ||
<span><div style="position: | <span style="display:inline-block;"><div style="position:relative;left:16px;z-index:10;top:0px;"><div style="pointer-events:none">[[File:Minimap back.png|link=|]]</div> | ||
<div style="position:absolute;left: | <div style="position:absolute;left:10px;z-index:12;top:10px">{{exist|File:{{{imagelink|{{{scenario}}}}}} map {{{image_size|fullauto}}}.{{{image_type|png}}}|[[File:{{{imagelink|{{{scenario}}}}}} map {{{image_size|fullauto}}}.{{{image_type|png}}}|144px]]| }}</div> | ||
<div style="position:absolute;left: | <div style="position:absolute;left:10px;z-index:12;top:158px">{{exist|File:{{{scenario}}} minimap.png|[[File:{{{imagelink|{{{scenario}}}}}} minimap.png|144px]]| }}</div> | ||
<div style="position:absolute;left: | <div style="position:absolute;left:10px;z-index:12;top:306px">{{exist|File:{{{imagelink|{{{scenario}}}}}} underground map {{{u_image_size|fullauto}}}.{{{u_image_type|png}}}|[[File:{{{imagelink|{{{scenario}}}}}} underground map {{{u_image_size|fullauto}}}.{{{u_image_type|png}}}|144px]]| }}</div> | ||
<div style="position:absolute;left: | <div style="position:absolute;left:10px;z-index:12;top:454px">{{exist|File:{{{scenario}}} underground minimap.png|[[File:{{{imagelink|{{{scenario}}}}}} underground minimap.png|144px]]| }}</div></div></span></includeonly><noinclude> | ||
{{ | {{CampaignScenario | ||
| scenario = World on Fire | | scenario = World on Fire | ||
| description = Henrietta and Frederick must bring the Orb of Tempestuous Fire to Frederick's Laboratory. If Henrietta is defeated, you will lose the scenario. Your heroes are limited to level 6, but Henrietta and Frederick will bring the Charm of Mana and the Collar of Conjuring to the next scenario. | | description = Henrietta and Frederick must bring the Orb of Tempestuous Fire to Frederick's Laboratory. If Henrietta is defeated, you will lose the scenario. Your heroes are limited to level 6, but Henrietta and Frederick will bring the Charm of Mana and the Collar of Conjuring to the next scenario. | ||
| Line 33: | Line 33: | ||
| underground = enabled | | underground = enabled | ||
| source = hota | | source = hota | ||
| victory = Transport Artifact | | victory = Transport Artifact {{gl|Orb of Tempestuous Fire}} to {{gl|Laboratory}} or Defeat All Enemies. | ||
| loss = Lose Hero | | loss = Lose Hero {{gl|Henrietta}} the {{gl|Mercenary}}. | ||
| allies = {{green}} | | allies = {{green}} | ||
| enemies = {{red}} | | enemies = {{red}} | ||
| bonus = {{BonusSec|Archery|Basic}}{{BonusArt|Centaur's Axe}}{{BonusArt|Ring of Suppression}} | | bonus = {{BonusSec|Archery|Basic}}{{BonusArt|Centaur's Axe}}{{BonusArt|Ring of Suppression}} | ||
| carry = {{Hn|Henrietta|noname=}} {{Hn|Frederick|noname=}} {{An|Charm of Mana|noname=}} {{An|Collar of Conjuring|noname=}} | | carry = {{Hn|Henrietta|noname=}}{{Hn|Frederick|noname=}} {{An|Charm of Mana|noname=}} {{An|Collar of Conjuring|noname=}} | ||
| difficulty = Easy | | difficulty = Easy | ||
| max_lvl = 6 | | max_lvl = 6 | ||
| Line 45: | Line 45: | ||
}} | }} | ||
{{CampaignScenario | |||
| scenario = A Friendly Visit | |||
| description = To prevail, Dargem must deliver the Dragon Scale Shield to the town of Maramec. The maximum level of heroes is 12. After winning, Dargem will proceed to the next scenario. | |||
| underground = enabled | |||
| size = M | |||
| source = hota | |||
| victory = Transport Artifact {{gl|Dragon Scale Shield}} to {{gl|Maramec}}. | |||
| loss = Lose Hero {{gl|Dargem}} the {{gl|Navigator}}. | |||
| allies = {{tan}} | |||
| enemies = {{orange}} | |||
| difficulty = Normal | |||
| bonus = {{BonusCr|Crew Mate|10}}{{BonusPri|Power|1}}{{BonusArt|Ring of Vitality}} | |||
| carry = {{Hn|Dargem|noname=}}{{-}}{{carry|3}} | |||
| max_lvl = 12 | |||
| cback = hota ai 1 | |||
| region_text = In an effort to restore his shattered reputation, Dargem Llywellyn, a pirate and adventurer, goes on a challenging mission in his erstwhile homeland of Nighon, where hardly anyone longs for him. | |||
}} | |||
{{campaign navigational box|roe=expanded|spoilsofwar=expanded}} | |||
{{CampaignScenario | |||
| scenario = Greed | |||
| description = To win, you must capture all towns and castles and defeat all enemy heroes. Regardless of which side you choose, the other will forever consider you a traitor. | |||
| underground = disabled | |||
| num_play = 3/2 | |||
| size = L | |||
| source = roe | |||
| victory = Defeat All Enemies. | |||
| loss = Lose All Your Towns and Heroes. | |||
| allies = {{blue}}/ {{purple}} | |||
| enemies = {{blue}}/ {{purple}}+ {{red}} | |||
| difficulty = Normal | |||
| bonus = {{BonusT|Fortress|{{blue}}|title=Start with heroes from 'Borderlands'}}{{BonusT|Stronghold|{{purple}}|title=Start with heroes from 'Gold Rush'}} | |||
| cback = roe sow 3 | |||
| region_text = Both King Tralossk of Tatalia and Duke Boragus of Krewlod are seeking your services. Both nations are poised to claim the last strip of land between their countries. Ironically, this land has little value. You must decide which nation to serve. The choice is yours alone. | |||
}} | |||
{{CampaignScenario | |||
| scenario = The Queen's Command | |||
| description = Tarnum must defeat all of his enemies. Tarnum and Queen Allison must not be killed. All Heroes will be limited to level 32, but Tarnum will transfer over to the next scenario. | |||
| underground = enabled | |||
| num_play = 5/1 | |||
| size = S | |||
| source = hc | |||
| victory = Defeat Hero {{gl|Jorm}} the {{gl|Demoniac}}. | |||
| loss = Lose Hero {{gl|Tarnum}} the {{gl|Knight}} or {{gl|Allison}} the {{gl|Knight}}. | |||
| allies = {{red}}+ {{blue}}{{green}} | |||
| enemies = 1: {{orange}}{{purple}} | |||
| difficulty = Normal | |||
| bonus = {{BonusArt|Endless Sack of Gold|loc=Tarnum}}{{BonusSec|Estates|Expert|loc=Allison}} | |||
| carry = {{Hn|Tarnum (Knight)|noname=}}{{An|Helm of Heavenly Enlightenment|noname=}}{{An|Sword of Judgement|noname=}}{{An|Lion's Shield of Courage|noname=}}<br>{{An|Celestial Necklace of Bliss|noname=}}{{An|Sandals of the Saint|noname=}}{{An|Armor of Wonder|noname=}} | |||
| max_lvl = 32 | |||
| cback = chronicles 2 | |||
}} | |||
__NOTOC__ | __NOTOC__ | ||
[[Category:Map templates]]</noinclude> | [[Category:Map templates]]</noinclude> | ||
Revision as of 19:51, 16 April 2025

Scenario Description
Henrietta and Frederick must bring the Orb of Tempestuous Fire to Frederick's Laboratory. If Henrietta is defeated, you will lose the scenario. Your heroes are limited to level 6, but Henrietta and Frederick will bring the Charm of Mana and the Collar of Conjuring to the next scenario.
Victory Condition
Transport Artifact Orb of Tempestuous Fire to Laboratory or Defeat All Enemies.
Loss Condition
Allies: 
Enemies: 
Choose a bonus


Difficulty
Easy
Carried to next scenario
Level cap
6


Scenario Description
To prevail, Dargem must deliver the Dragon Scale Shield to the town of Maramec. The maximum level of heroes is 12. After winning, Dargem will proceed to the next scenario.
Victory Condition
Transport Artifact Dragon Scale Shield to Maramec.
Loss Condition
Allies: 
Enemies: 
Choose a bonus

10

+1

Difficulty
Normal
Carried to next scenario
Level cap
12


Scenario Description
To win, you must capture all towns and castles and defeat all enemy heroes. Regardless of which side you choose, the other will forever consider you a traitor.
Victory Condition
Defeat All Enemies.
Loss Condition
Lose All Your Towns and Heroes.
Allies:  /
/ 
Enemies: / +
Choose a bonus


Difficulty
Normal
Carried to next scenario
Level cap


Scenario Description
Tarnum must defeat all of his enemies. Tarnum and Queen Allison must not be killed. All Heroes will be limited to level 32, but Tarnum will transfer over to the next scenario.
Victory Condition
Loss Condition
Allies: +
Enemies: 1:
Choose a bonus


Difficulty
Normal
Carried to next scenario
Level cap
32


