War Machine: Difference between revisions
No edit summary |
|||
| (115 intermediate revisions by 24 users not shown) | |||
| Line 1: | Line 1: | ||
'''War | <span style="float:right">__TOC__</span> | ||
'''War Machine''' is a term that refers to Ammo Carts, Ballistas, {{showwithhota|Cannons{{-wh}}, }}First Aid Tents, and Catapults. When purchased, they participate in combat on the owner's side of the battlefield. They do not participate in combat when battling [[creature bank|creature banks]] and [[shipwreck|shipwrecks]]. Catapults are only used in siege combats. Each War Machine has its own reserved [[Artifacts#Artifact_slots|slot]]{{showwithhota| except for the Cannon, which shares its slot with the Ballista}}. | |||
All [[hero]]es come equipped with a Catapult. Other War Machines are bought from [[Blacksmith|Blacksmiths]], which sell different War Machine depending on the [[town]], or [[War Machine Factory]] on the [[Adventure Map]], which sell Ammo Carts, Ballistas, and First Aid Tents. {{showwithhota|Cannons can be purchased from a [[Cannon Yard]].}} [[Stronghold]] towns can build a [[Ballista Yard]], allowing heroes to purchase Ballistas as well as Ammo Carts from the town. | |||
War Machines are immobile and unaffected by [[Morale]], but Ballistas {{swh|and Cannons{{-wh}}||noicon=}}are affected by [[Luck]]. War Machines do not affect a hero's [[movement]]. In battle, the AI considers Ballistas{{showwithhota|, Cannons}} and Catapults to be ranged units. | |||
War | War Machines (except Catapults) can be traded between heroes, but cannot be dismissed or placed in the hero's backpack.{{swh| In {{hota}}{{-wh}}, War Machines (except Catapults) can be dismissed.||noicon=}} | ||
'''War Machines are immune to:''' | |||
{| | {| | ||
|- valign=top | |||
| | |'''Spells''' | ||
*{{Sn|Implosion}} | |||
*{{Sn|Clone}} | |||
*{{Sn|Bloodlust}} | |||
*[[Mind spell|Mind spells]] - ([[Berserk]], [[Blind]], [[Forgetfulness]], [[Frenzy]], [[Hypnotize]], [[Mirth]], [[Sorrow]]) | |||
**''{{Sn|Berserk}} can be cast without any effect.'' | |||
**''{{Sn|Frenzy}} can be cast by the {{an|Orb of Vulnerability}} owner.'' | |||
*{{Sn|Death Ripple}} and {{Sn|Destroy Undead}} | |||
*{{Sn|Slow}} and {{Sn|Haste}} | |||
*{{Sn|Teleport}} | |||
*{{Sn|Resurrection}} and {{Sn|Sacrifice}} | |||
*{{Sn|Counterstrike}} | |||
| | |||
|'''Abilities''' | |||
| | <ul> | ||
| | <li>[[Aging]]: {{cn|Ghost Dragon}}</li> | ||
<li>[[Death Cloud]]: {{cnu|Lich|Power Lich}}</li> | |||
<li>[[Death Stare]]: {{cn|Mighty Gorgon}}</li> | |||
<li>[[Disease]]: {{cn|Zombie}}</li> | |||
<li>[[Fear]]: {{cn|Azure Dragon}}{{-wa}}</li> | |||
| | <li>[[Life Drain]]: {{cn|Vampire Lord}}</li> | ||
| | <li>[[Paralyze]]: {{cn|Scorpicore}}</li> | ||
<li>[[Petrify]]: {{cnu|Medusa|Medusa Queen|name=Medusas}}, {{cnu|Basilisk|Greater Basilisk|name=Basilisks}}</li> | |||
<li>[[Poison]]: {{cn|Wyvern Monarch}}{{swh|, {{cnu|Sea Serpent|Haspid}}{{-wh}}||noicon=}}</li> | |||
<li>[[Summon Demons]]: {{cn|Pit Lord}}</li> | |||
<li class="onlyhota">[[Accurate Shot]]: {{cn|Sea Dog}}{{-wh}}</li> | |||
<li class="onlyhota">[[Preemptive Shot]]: {{cnu|Gunslinger|Bounty Hunter}}{{-wh}}</li> | |||
<li class="onlyhota">[[Repair]]: {{cnu|Mechanic|Engineer}}{{-wh}}</li> | |||
<li class="onlyhota">[[Freezing Shot]]: {{cn|Great Shaman}}{{-wh}}</li> | |||
</ul> | |||
|} | |} | ||
'''War Machines are affected by these spells:'''<br> | |||
<small>''Note that damage dealing related buffs are effective for [[Ballista]] {{swh|and [[Cannon]]{{-wh}}||noicon=}}only:''</small> | |||
*{{Sn|Cure}} | |||
*{{Sn|Anti-Magic}} and {{Sn|Dispel}} | |||
*{{Sn|Fortune}} and {{Sn|Misfortune}} | |||
*{{Sn|Bless}} and {{Sn|Curse}} | |||
*{{Sn|Slayer}}, {{Sn|Prayer}} and {{Sn|Precision}} | |||
*{{Sn|Shield}} and {{Sn|Stone Skin}} | |||
*{{Sn|Air Shield}} and {{Sn|Magic Mirror}} | |||
*{{Sn|Protection from Air}}, {{Sn|Protection from Earth}}, {{Sn|Protection from Fire}} and {{Sn|Protection from Water}} | |||
*{{Sn|Fire Shield}} | |||
=== Ballista === | |||
{{Creature/Ballista}} | |||
The Ballista is a missile weapon that shoots projectiles toward enemy troops and is unable to [[retaliation|retaliate]] against attacks. It can shoot even if enemies are adjacent to it. The Ballista acts at the end of every combat round, followed only by the [[First Aid Tent]], and can be controlled when a hero has learned any level of Artillery. Contrary to what its in-game statistics indicate, a Ballista has unlimited shots ''(fixed in {{hota}}{{-wh}})''. Occupies the War Machine A slot. | |||
'''*Ballista Damage:''' Although the Ballista has a basic damage range (of 2–3) like creatures, its damage range scales with the controlling hero's attack value according to the formula: {{swh|(2–3)*(hero's attack + 5)|(2–3)*(hero's attack + 1)}}. This modified damage range is then used in the [[damage]] calculation as normal. Both the [[Artillery]] and [[Archery]] secondary skills increase the damage of the Ballista. | |||
Heroes with the Ballista specialty have a {{swh|100%|88%}} chance to start with a Ballista. | |||
{| | {| | ||
| | |- valign=top | ||
|- | |'''Ballista can be purchased at:'''{{---}} | ||
| | *{{town|Castle}} - [[Blacksmith]] | ||
| | *{{town|Dungeon}} - [[Blacksmith]] | ||
| | *{{town|Stronghold}} - [[Ballista Yard]] | ||
|- | *{{town|Conflux}} - [[Blacksmith]]{{-wa}} | ||
*[[file:War Machine Factory.gif|War Machine Factory|50px]] [[War Machine Factory]] | |||
|'''Heroes with Ballista specialty:''' | |||
<ul> | |||
<li>{{H2|Christian|Knight}}</li> | |||
<li>{{H2|Torosar|Alchemist}}</li> | |||
<li>{{H2|Pyre|Demoniac}}</li> | |||
<li>{{H2|Arlach|Overlord}}</li> | |||
<li>{{H2|Gurnisson|Barbarian}}</li> | |||
<li>{{H2|Gerwulf|Beastmaster}}</li> | |||
<li class="onlyhota">{{H2|Ranloo|Death Knight}}{{-wh}}</li> | |||
<li class="onlyhota">{{H2|Morton|Mercenary}}{{-wh}}</li> | |||
</ul> | |||
|} | |} | ||
{{clear|left}} | |||
=== Ammo Cart === | === Ammo Cart === | ||
{{Creature/Ammo Cart}} | |||
The Ammo Сart provides unlimited [[shots]] for creatures and War Machines with [[ranged attack|ranged attacks]] until the Ammo Cart is destroyed, after which their shots will deplete as normal. Although the Ammo Cart is not present on the battlefield during a creature bank or shipwreck battle, it still provides unlimited ammo. Occupies the War Machine B slot. | |||
Ammo Сart provides unlimited [[ | |||
{| | |||
|- valign=top | |||
| '''Ammo Cart can be purchased at:''' | |||
<ul> | |||
<li>{{town|Tower}} - [[Blacksmith]]</li> | |||
<li>{{town|Inferno}} - [[Blacksmith]]</li> | |||
<li>{{town|Stronghold}} - [[Blacksmith]]</li> | |||
<li class="onlyhota">{{town|Factory}} - [[Blacksmith]]{{-wh}}</li> | |||
<li>[[file:War Machine Factory.gif|War Machine Factory|50px]] [[War Machine Factory]]</li> | |||
</ul> | |||
|} | |} | ||
{{clear|left}} | |||
=== First Aid Tent === | |||
{{Creature/First Aid Tent}} | |||
The First Aid Tent heals {{swh|20-25|1-25}} [[Health|hit points]] of the top creature of an allied stack. The amount of health restored is affected by [[First aid|First Aid secondary skill]], which also gives the player control over the tent rather than being chosen by computer. First Aid Tents act last at the combat round. Oddly enough, [[Necropolis]]' heroes cannot learn [[First Aid]], even though their blacksmith produces First Aid Tents. Occupies the War Machine C slot. | |||
Heroes with First Aid specialty have a {{swh|100%|88%}} chance to start with a First Aid Tent. | |||
{| | |||
{| | |- valign=top | ||
|- | | '''First Aid Tent can be purchased at:'''{{---}} | ||
| {{ | *{{town|Rampart}} - [[Blacksmith]] | ||
*{{town|Necropolis}} - [[Blacksmith]] | |||
*{{town|Fortress}} - [[Blacksmith]] | |||
*<li class="onlyhota">{{town|Bulwark}} - [[Blacksmith]]{{-wh}}</li> | |||
*[[file:War Machine Factory.gif|War Machine Factory|50px]] [[War Machine Factory]] | |||
| '''Heroes with First Aid specialty:''' | |||
<ul> | |||
<li>{{H2|Rion|Cleric}}</li> | |||
<li>{{H2|Gem|Druid}}</li> | |||
}} | <li>{{H2|Verdish|Witch}}</li> | ||
<li class="onlyhota">{{H2|Floribert|Mercenary}}{{-wh}}</li> | |||
<li class="onlyhota">{{H2|Biarma|Elder}}{{-wh}}</li> | |||
</ul> | |||
|} | |} | ||
{{clear|left}} | |||
=== Catapult === | === Catapult === | ||
{ | {{Creature/Catapult}} | ||
The Catapult only appears on the battlefield when laying [[siege]] to an enemy town with [[wall|walls]], which requires the town to have a [[fort]], [[citadel]], or [[Castle (structure)|castle]]. Its main use is to attack and destroy the walls in order to enable ground troops to attack the defenders. The Catapult can also attack and destroy the [[arrow tower|arrow towers]] of citadels and castles. The [[Ballistics]] secondary skill enhances its performance and gives the player control over the Catapult, making it possible to aim at particular parts of the [[fortifications]]. During a siege, the Catapult shoots after the arrow towers, but before any other troop. Occupies the War Machine D slot. | |||
{{clear|left}} | |||
== {{hota}} == | |||
=== Cannon === | |||
{{Creature/Cannon}} | |||
The Cannon is a missile weapon that shoots projectiles toward enemy troops and is unable to [[retaliation|retaliate]] against attacks. It can shoot even if enemies are adjacent to it. The Cannon acts at the end of every combat round, followed only by the [[First Aid Tent]], and can be controlled when a hero has learned any level of [[Artillery]]. It can also attack the [[fortifications]] of a town in [[siege]] combat. Occupies the War Machine A slot. | |||
'''*Cannon Damage:''' Although the Cannon has a basic damage range (of 4-7) like creatures, its damage range scales with the controlling hero's attack value according to the formula: (4–7)*(hero's attack + 1). This modified damage range is then used in the [[damage]] calculation as normal. Both the [[Artillery]] and [[Archery]] secondary skills increase the damage of the Cannon. | |||
}} | |||
The Catapult only appears on the battlefield when [[siege | |||
Heroes with the Cannon specialty always start with a Cannon. | |||
{| | |||
= | |- valign=top | ||
|'''Cannon can be purchased at:'''{{---}} | |||
*{{town|Cove}} - [[Blacksmith]] | |||
*[[file:Cannon Yard.gif|Cannon Yard|46px]] [[Cannon Yard]] | |||
|'''Heroes with Cannon specialty:''' | |||
* {{H2|Jeremy|Captain}} | |||
}} | |||
|} | |} | ||
{{clear|left}} | |||
=== Ballista vs. Cannon === | |||
Here a table showing the average damage of a Ballista and Cannon with and without the [[Artillery]] skill. | |||
''' | '''Notes:''' | ||
* | * The Cannon has 20 Attack and 8 shots while the Ballista has only 10 Attack but 24 shots. | ||
* The [[Archery]] skill will increase this damage further. | |||
* | * Damage multipliers and multiple shots from the [[Artillery]] skill are factored into the table. | ||
* | |||
''' | '''Takeaway:''' | ||
* | * Without [[Artillery]], the Ballista only does more damage than the Cannon when the Hero's attack is 0. | ||
* With Expert [[Artillery]], the Ballista does more damage than the Cannon when the Hero's attack is 3 or less. | |||
* Even Ballista specialists (e.g. [[Christian]]) do more damage with the Cannon most of the time (unless they are at a high level AND have low attack). | |||
** Example: At level 25, Ballista specialist adds +15 to the Ballista's attack. This allows the Ballista to do more damage than the Cannon until the hero's attack reaches 10. If their attack is 11+, even a level 25 Ballista specialist does more damage with a Cannon. | |||
{| class="wikitable" style="vertical-align:bottom;" | {| class="wikitable" style="vertical-align:bottom;" | ||
|- style="font-weight:bold; text-align:center;" | |- style="font-weight:bold; text-align:center;" | ||
! rowspan="4 | ! rowspan="4" | Hero<br>Attack | ||
! colspan="8" | Average damage | ! colspan="8" | Average damage against creature with 10 defense {{swh||}} | ||
|- style="font-weight:bold; text-align:center;" | |- style="font-weight:bold; text-align:center;" | ||
! colspan="4" style="background-color:#FCE4D6;" | Ballista (10 Attack) | |||
! colspan="4" style="background-color:#D9E1F2;" | Cannon (20 Attack) | |||
|- style="text-align:center;" | |- style="text-align:center;" | ||
! rowspan="2" style="background-color:#FCE4D6;" | Base | |||
! colspan="3" style="background-color:#FCE4D6;" | Artillery | |||
! rowspan="2" style="background-color:#D9E1F2;" | Base | |||
! colspan="3" style="background-color:#D9E1F2;" | Artillery | |||
|- | |- | ||
! style="background-color:#FCE4D6;" | Basic | |||
! style="background-color:#FCE4D6;" | Advanced | |||
! style="background-color:#FCE4D6;" | Expert | |||
! style="background-color:#D9E1F2;" | Basic | |||
! style="background-color:#D9E1F2;" | Advanced | |||
! style="background-color:#D9E1F2;" | Expert | |||
|- | |- | ||
| 0 | | 0 || {{swh|noicon=|12.5|2.5}} || {{swh|noicon=|18.75|3.75}} || {{swh|noicon=|43.75|8.75}} || {{swh|noicon=|50|10}} || 8.25 || 8.25 || 13.75 || 19.25 | ||
| 2.5 | |||
| 3.75 | |||
| 8.75 | |||
| 10 | |||
| | |||
| | |||
| | |||
|- | |- | ||
| 1 | | 1 || {{swh|noicon=|15.75|5.25}} || {{swh|noicon=|23.25|7.75}} || {{swh|noicon=|54|18}} || {{swh|noicon=|61.5|20.5}} || 17.05 || 17.05 || 28.05 || 39.05 | ||
| 5 | |||
| 7.5 | |||
| 17. | |||
| | |||
| | |||
| | |||
| | |||
|- | |- | ||
| 2 | | 2 || {{swh|noicon=|19.25|8.25}} || {{swh|noicon=|28|12}} || {{swh|noicon=|64.75|27.75}} || {{swh|noicon=|73.5|31.5}} || 26.4 || 26.4 || 42.9 || 59.4 | ||
| | |||
| | |||
| | |||
| | |||
| | |||
| | |||
| | |||
|- | |- | ||
| 3 | | 3 || {{swh|noicon=|23|11.5}} || {{swh|noicon=|33|16.5}} || {{swh|noicon=|76|38}} || {{swh|noicon=|86|43}} || 36.3 || 36.3 || 58.3 || 80.3 | ||
| | |||
| | |||
| | |||
| | |||
| | |||
| | |||
| | |||
|- | |- | ||
| 4 | | 4 || {{swh|noicon=|27|15}} || {{swh|noicon=|38.25|21.25}} || {{swh|noicon=|87.75|48.75}} || {{swh|noicon=|99|55}} || 46.75 || 46.75 || 74.25 || 101.75 | ||
| | |||
| | |||
| | |||
| | |||
| | |||
| | |||
| | |||
|- | |- | ||
| 5 | | 5 || {{swh|noicon=|31.25|18.75}} || {{swh|noicon=|43.75|26.25}} || {{swh|noicon=|100|60}} || {{swh|noicon=|112.5|67.5}} || 57.75 || 57.75 || 90.75 || 123.75 | ||
| | |||
| | |||
| | |||
| | |||
| | |||
| | |||
| | |||
|- | |- | ||
| 10 | | 10 || {{swh|noicon=|56.25|41.25}} || {{swh|noicon=|75|55}} || {{swh|noicon=|168.75|123.75}} || {{swh|noicon=|187.5|137.5}} || 121 || 121 || 181.5 || 242 | ||
| | |||
| 41.25 | |||
| | |||
| | |||
| | |||
| 121 | |||
| 181.5 | |||
|- | |- | ||
| 15 | | 15 || {{swh|noicon=|87.5|70}} || {{swh|noicon=|112.5|90}} || {{swh|noicon=|250|200}} || {{swh|noicon=|275|220}} || 198 || 198 || 286 || 374 | ||
| | |||
| | |||
| | |||
| | |||
| | |||
| | |||
| | |||
|- | |- | ||
| 20 | | 20 || {{swh|noicon=|125|105}} || {{swh|noicon=|156.25|131.25}} || {{swh|noicon=|343.75|288.75}} || {{swh|noicon=|375|315}} || 288.75 || 288.75 || 404.25 || 519.75 | ||
| | |||
| | |||
| | |||
| | |||
| | |||
| | |||
| | |||
|- | |- | ||
| 25 | | 25 || {{swh|noicon=|168.75|146.25}} || {{swh|noicon=|206.25|178.75}} || {{swh|noicon=|450|390}} || {{swh|noicon=|487.5|422.5}} || 393.25 || 393.25 || 536.25 || 679.25 | ||
| | |||
| | |||
| | |||
| | |||
| | |||
| | |||
| | |||
|- | |- | ||
| 30 | | 30 || {{swh|noicon=|218.75|193.75}} || {{swh|noicon=|262.5|232.5}} || {{swh|noicon=|568.75|503.75}} || {{swh|noicon=|612.5|542.5}} || 511.5 || 511.5 || 682 || 852.5 | ||
| | |||
| | |||
| | |||
| | |||
| | |||
| | |||
| 511.5 | |||
|- | |- | ||
| 35 | | 35 || {{swh|noicon=|275|247.5}} || {{swh|noicon=|325|292.5}} || {{swh|noicon=|700|630}} || {{swh|noicon=|750|675}} || 643.5 || 643.5 || 841.5 ||1039.5 | ||
| | |||
| | |||
| | |||
| | |||
| | |||
| | |||
| | |||
|- | |- | ||
| 40 | | 40 || {{swh|noicon=|337.5|307.5}} || {{swh|noicon=|393.75|358.75}} || {{swh|noicon=|843.75|768.75}} || {{swh|noicon=|900|820}} || 789.25 || 789.25 ||1014.75 ||1240.25 | ||
| | |||
| | |||
| 358.75 | |||
| | |||
| | |||
| | |||
| | |||
|- | |- | ||
| 50 | | 50 || {{swh|noicon=|481.25|446.25}} || {{swh|noicon=|550|510}} ||{{swh|noicon=|1168.75|1083.75}} ||{{swh|noicon=|1237.5|1147.5}} ||1122 ||1122 ||1402.5 ||1683 | ||
| | |||
| | |||
| 446.25 | |||
| 510 | |||
| | |||
| | |||
| | |||
|- | |- | ||
| 60 | | 60 || {{swh|noicon=|650|610}} || {{swh|noicon=|731.25|686.25}} ||{{swh|noicon=|1543.75|1448.75}} ||{{swh|noicon=|1625|1525}} ||1342 ||1342 ||1677.5 ||2013 | ||
| | |||
| | |||
| | |||
| | |||
| | |||
| | |||
| | |||
|- | |- | ||
| 70 | | 70 || {{swh|noicon=|750|710}} || {{swh|noicon=|843.75|798.75}} ||{{swh|noicon=|1781.25|1686.25}} ||{{swh|noicon=|1875|1775}} ||1562 ||1562 ||1952.5 ||2343 | ||
| | |||
| | |||
| | |||
| | |||
| | |||
| | |||
| | |||
|- | |- | ||
| 80 | | 80 || {{swh|noicon=|850|810}} || {{swh|noicon=|956.25|911.25}} ||{{swh|noicon=|2018.75|1923.75}} ||{{swh|noicon=|2125|2025}} ||1782 ||1782 ||2227.5 ||2673 | ||
| | |||
| | |||
| | |||
| | |||
| | |||
| | |||
| | |||
|- | |- | ||
| 90 | | 90 || {{swh|noicon=|950|910}} ||{{swh|noicon=|1068.75|1023.75}} ||{{swh|noicon=|2256.25|2161.25}} ||{{swh|noicon=|2375|2275}} ||2002 ||2002 ||2502.5 ||3003 | ||
| | |||
| | |||
| | |||
| | |||
| | |||
| | |||
| | |||
|- | |- | ||
| 99 | | 99 ||{{swh|noicon=|1040|1000}} ||{{swh|noicon=|1170|1125}} ||{{swh|noicon=|2470|2375}} ||{{swh|noicon=|2600|2500}} ||2200 ||2200 ||2750 ||3300 | ||
| | |||
| | |||
| | |||
| 1000 | |||
| | |||
| | |||
| | |||
|} | |} | ||
== Sounds == | |||
{{CreatureSounds|Ballista|ranged=y|hideatk=y|hidedef=y|hidemove=y}} | |||
{{CreatureSounds|Cannon|ranged=y|hideatk=y|hidedef=y|hidemove=y}} | |||
{{CreatureSounds|Catapult|ranged=y|hideatk=y|hidedef=y|hidemove=y}} | |||
{{CreatureSounds|Ammo Cart|hideatk=y|hidedef=y|hidemove=y}} | |||
{{CreatureSounds|First Aid Tent|hideatk=y|hidedef=y|hidemove=y}} | |||
{{SoundClickInfo}} | |||
== Gallery == | |||
<gallery mode="packed-hover"> | |||
Cannon render.png| Model by [[Alex-ander]] | |||
Catapult cbtemplate.png | |||
Ballista cbtemplate.png | |||
Ammo Cart cbtemplate.png | |||
Cannon cbtemplate.png | |||
First Aid Tent cbtemplate.png | |||
SoD_CD-Heroes3-Data-Heroes3_snd-H3x2RNa-smk-H3x2_RNa.webm|thumbtime=0:00| [[Undead]] using a Catapult to attack a [[Dungeon]]<br>([[Target]]{{-ws}} prologue) | |||
</gallery> | |||
{{user commentary| | |||
In general, the importance of War Machines is decreasing throughout the game, as you have big army and powerful damage spells. | |||
The Ballista is a war machine of some limited use, however it requires a high (25+) Attack skill before it starts dealing enough damage to justify its 2500 Gold cost. The [[Artillery]] skill can offset this somewhat, but comes with the high opportunity cost of omitting a potentially more useful [[secondary skill]] such as [[Offense]] or [[Armorer]]. The above restrictions generally limit the Ballista to might heroes with high Attack skill. Of the four towns that sell Ballistae, Barbarians from [[Stronghold]] are most likely to reach this skill - more defensive heroes such as those from [[Fortress]] will not be able to make use of the Ballista as efficiently. Note that if you don't have [[Artillery]] skill, Ballista can spoil the battle if you want to [[blind]] the only remaining enemy stack and [[Resurrection|resurrect]]/[[Animate Dead|animate]] your whole army. It will shoot and unblind the enemy. Most of this applies to the Cannon{{-wh}} as well. | |||
The First Aid tent is most often useless, even with the (also nearly useless) [[First Aid]] skill at its top level. Its main limitation is that it cannot resurrect killed creatures, so it's useless for low-level creatures. The only case in which a First Aid Tent is useful is when a player obtains a high-level creature early in the game. Setting a hero up with 1-2 high level creatures and a first-aid tent ensures that the healing is not wasted and allows the player to clear wandering monsters from the map more easily. You may start with a hero with First Aid tent, even if your blacksmith doesn't produce it, and rush through the map using 1-2 sixth level creatures. | |||
The Ammo Cart's unlimited ammunition is usually unnecessary besides a very long battle, but is extremely useful in the few situations when it is needed. Most shooters in the game have enough ammunition to attack 12 times, with many carrying more. The few exceptions are [[Master Gremlin|Master Gremlins]] and [[Medusa Queen|Medusa Queens]] (8 shots), and Medusas, [[Pirate|Pirates]], and Corsairs (only 4 shots!). With good Morale, these creatures run the risk of quickly depleting their ammunition over the course of a battle. This can be the difference between defeat and victory, particularly in a bloody castle siege. If the enemy Catapult can be destroyed and their flying units killed, even a single shooter with an ammunition cart can eventually drive off the enemy if the walls are still intact. | |||
As every hero gets a Catapult free of cost which is only deployed for siege warfare, there is little choice involved in catapult usage other than targeting with the [[Ballistics]] skill. | |||
}}{{end of user commentary}} | |||
[[Category: Combat]] | [[Category: Combat]] | ||
[[Category: Terms]] | |||
Latest revision as of 14:44, 9 January 2026
War Machine is a term that refers to Ammo Carts, Ballistas, Cannons ![]() , First Aid Tents, and Catapults. When purchased, they participate in combat on the owner's side of the battlefield. They do not participate in combat when battling creature banks and shipwrecks. Catapults are only used in siege combats. Each War Machine has its own reserved slot except for the Cannon, which shares its slot with the Ballista.
, First Aid Tents, and Catapults. When purchased, they participate in combat on the owner's side of the battlefield. They do not participate in combat when battling creature banks and shipwrecks. Catapults are only used in siege combats. Each War Machine has its own reserved slot except for the Cannon, which shares its slot with the Ballista.
All heroes come equipped with a Catapult. Other War Machines are bought from Blacksmiths, which sell different War Machine depending on the town, or War Machine Factory on the Adventure Map, which sell Ammo Carts, Ballistas, and First Aid Tents. Cannons can be purchased from a Cannon Yard. Stronghold towns can build a Ballista Yard, allowing heroes to purchase Ballistas as well as Ammo Carts from the town.
War Machines are immobile and unaffected by Morale, but Ballistas and Cannons ![]() are affected by Luck. War Machines do not affect a hero's movement. In battle, the AI considers Ballistas, Cannons and Catapults to be ranged units.
are affected by Luck. War Machines do not affect a hero's movement. In battle, the AI considers Ballistas, Cannons and Catapults to be ranged units.
War Machines (except Catapults) can be traded between heroes, but cannot be dismissed or placed in the hero's backpack. In Horn of the Abyss ![]() , War Machines (except Catapults) can be dismissed.
, War Machines (except Catapults) can be dismissed.
War Machines are immune to:
Spells
|
Abilities
|
War Machines are affected by these spells:
Note that damage dealing related buffs are effective for Ballista and Cannon ![]() only:
only:
 Cure
Cure Anti-Magic and
  Dispel
 Fortune and
  Misfortune
 Bless and
  Curse
Curse Slayer,
  Prayer and
  Precision
 Shield and
  Stone Skin
 Air Shield and
  Magic Mirror
 Protection from Air,
  Protection from Earth,
  Protection from Fire and
  Protection from Water
 Fire Shield
Ballista[edit | hide | hide all]
The Ballista is a missile weapon that shoots projectiles toward enemy troops and is unable to retaliate against attacks. It can shoot even if enemies are adjacent to it. The Ballista acts at the end of every combat round, followed only by the First Aid Tent, and can be controlled when a hero has learned any level of Artillery. Contrary to what its in-game statistics indicate, a Ballista has unlimited shots (fixed in Horn of the Abyss ![]() ). Occupies the War Machine A slot.
). Occupies the War Machine A slot.
*Ballista Damage: Although the Ballista has a basic damage range (of 2–3) like creatures, its damage range scales with the controlling hero's attack value according to the formula: (2–3)*(hero's attack + 5) ![]() (2–3)*(hero's attack + 1)
(2–3)*(hero's attack + 1) ![]() . This modified damage range is then used in the damage calculation as normal. Both the Artillery and Archery secondary skills increase the damage of the Ballista.
. This modified damage range is then used in the damage calculation as normal. Both the Artillery and Archery secondary skills increase the damage of the Ballista.
Heroes with the Ballista specialty have a 100% ![]() 88%
88% ![]() chance to start with a Ballista.
chance to start with a Ballista.
| Ballista can be purchased at: | Heroes with Ballista specialty: |
Ammo Cart[edit | hide]

1000
The Ammo Сart provides unlimited shots for creatures and War Machines with ranged attacks until the Ammo Cart is destroyed, after which their shots will deplete as normal. Although the Ammo Cart is not present on the battlefield during a creature bank or shipwreck battle, it still provides unlimited ammo. Occupies the War Machine B slot.
| Ammo Cart can be purchased at: |
First Aid Tent[edit | hide]

750
The First Aid Tent heals 20-25 ![]() 1-25
1-25 ![]() hit points of the top creature of an allied stack. The amount of health restored is affected by First Aid secondary skill, which also gives the player control over the tent rather than being chosen by computer. First Aid Tents act last at the combat round. Oddly enough, Necropolis' heroes cannot learn First Aid, even though their blacksmith produces First Aid Tents. Occupies the War Machine C slot.
hit points of the top creature of an allied stack. The amount of health restored is affected by First Aid secondary skill, which also gives the player control over the tent rather than being chosen by computer. First Aid Tents act last at the combat round. Oddly enough, Necropolis' heroes cannot learn First Aid, even though their blacksmith produces First Aid Tents. Occupies the War Machine C slot.
Heroes with First Aid specialty have a 100% ![]() 88%
88% ![]() chance to start with a First Aid Tent.
chance to start with a First Aid Tent.
| First Aid Tent can be purchased at: | Heroes with First Aid specialty: |
Catapult[edit | hide]

N/A
The Catapult only appears on the battlefield when laying siege to an enemy town with walls, which requires the town to have a fort, citadel, or castle. Its main use is to attack and destroy the walls in order to enable ground troops to attack the defenders. The Catapult can also attack and destroy the arrow towers of citadels and castles. The Ballistics secondary skill enhances its performance and gives the player control over the Catapult, making it possible to aim at particular parts of the fortifications. During a siege, the Catapult shoots after the arrow towers, but before any other troop. Occupies the War Machine D slot.
Horn of the Abyss[edit | hide]
Cannon[edit | hide]

3000
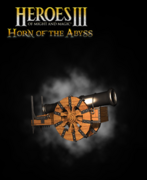
The Cannon is a missile weapon that shoots projectiles toward enemy troops and is unable to retaliate against attacks. It can shoot even if enemies are adjacent to it. The Cannon acts at the end of every combat round, followed only by the First Aid Tent, and can be controlled when a hero has learned any level of Artillery. It can also attack the fortifications of a town in siege combat. Occupies the War Machine A slot.
*Cannon Damage: Although the Cannon has a basic damage range (of 4-7) like creatures, its damage range scales with the controlling hero's attack value according to the formula: (4–7)*(hero's attack + 1). This modified damage range is then used in the damage calculation as normal. Both the Artillery and Archery secondary skills increase the damage of the Cannon.
Heroes with the Cannon specialty always start with a Cannon.
| Cannon can be purchased at: | Heroes with Cannon specialty: |
Ballista vs. Cannon[edit | hide]
Here a table showing the average damage of a Ballista and Cannon with and without the Artillery skill.
Notes:
- The Cannon has 20 Attack and 8 shots while the Ballista has only 10 Attack but 24 shots.
- The Archery skill will increase this damage further.
- Damage multipliers and multiple shots from the Artillery skill are factored into the table.
Takeaway:
- Without Artillery, the Ballista only does more damage than the Cannon when the Hero's attack is 0.
- With Expert Artillery, the Ballista does more damage than the Cannon when the Hero's attack is 3 or less.
- Even Ballista specialists (e.g. Christian) do more damage with the Cannon most of the time (unless they are at a high level AND have low attack).
- Example: At level 25, Ballista specialist adds +15 to the Ballista's attack. This allows the Ballista to do more damage than the Cannon until the hero's attack reaches 10. If their attack is 11+, even a level 25 Ballista specialist does more damage with a Cannon.
Sounds[edit | hide]
 
|
Shoot | Hurt | Death |
|---|---|---|---|
 
|
Shoot | Hurt | Death |
|---|---|---|---|
 
|
Shoot | Hurt | Death |
|---|---|---|---|
 
|
Hurt | Death |
|---|---|---|
 
|
Hurt | Death |
|---|---|---|
Note: Clicking the icons will play the corresponding sound. Volume control in left side panel.
Gallery[edit | hide]
-
Model by Alex-ander
-
User Commentary
In general, the importance of War Machines is decreasing throughout the game, as you have big army and powerful damage spells.
The Ballista is a war machine of some limited use, however it requires a high (25+) Attack skill before it starts dealing enough damage to justify its 2500 Gold cost. The Artillery skill can offset this somewhat, but comes with the high opportunity cost of omitting a potentially more useful secondary skill such as Offense or Armorer. The above restrictions generally limit the Ballista to might heroes with high Attack skill. Of the four towns that sell Ballistae, Barbarians from Stronghold are most likely to reach this skill - more defensive heroes such as those from Fortress will not be able to make use of the Ballista as efficiently. Note that if you don't have Artillery skill, Ballista can spoil the battle if you want to blind the only remaining enemy stack and resurrect/animate your whole army. It will shoot and unblind the enemy. Most of this applies to the Cannon ![]() as well.
as well.
The First Aid tent is most often useless, even with the (also nearly useless) First Aid skill at its top level. Its main limitation is that it cannot resurrect killed creatures, so it's useless for low-level creatures. The only case in which a First Aid Tent is useful is when a player obtains a high-level creature early in the game. Setting a hero up with 1-2 high level creatures and a first-aid tent ensures that the healing is not wasted and allows the player to clear wandering monsters from the map more easily. You may start with a hero with First Aid tent, even if your blacksmith doesn't produce it, and rush through the map using 1-2 sixth level creatures.
The Ammo Cart's unlimited ammunition is usually unnecessary besides a very long battle, but is extremely useful in the few situations when it is needed. Most shooters in the game have enough ammunition to attack 12 times, with many carrying more. The few exceptions are Master Gremlins and Medusa Queens (8 shots), and Medusas, Pirates, and Corsairs (only 4 shots!). With good Morale, these creatures run the risk of quickly depleting their ammunition over the course of a battle. This can be the difference between defeat and victory, particularly in a bloody castle siege. If the enemy Catapult can be destroyed and their flying units killed, even a single shooter with an ammunition cart can eventually drive off the enemy if the walls are still intact.
As every hero gets a Catapult free of cost which is only deployed for siege warfare, there is little choice involved in catapult usage other than targeting with the Ballistics skill.


